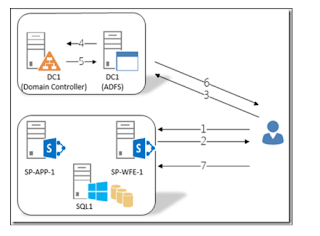
This post talks detailed high level steps that are to be
implemented for the configuration of IRM in SharePoint 2013 on premises for
both internal and external users.
Required Servers:
1)
SharePoint Server : We have to make changes in
the Central Admin under security section with RMS Server name so that SP Server
talks to the RMS server
2)
RMS Server:
This is place where core RMS role will be installed and other
configuration changes we need to do.
3)
Reverse Proxy Server: In order to authenticate external users RMS
server has to authenticate them so we need to have published internet server ,
in this case we are taking fresh new server and where we setup reverse proxy. More
details in the following sections.
Following are the
things need to be in place before configuration:
·
SSL Certificate for the reverse proxy server and
host name which will be published in Internet by mapping with the public IP and SSL will be
configured and implemented with this same host name.
·
Note all the server names and IPS and also note
the public IP which we are going to do natting with the reverse proxy server.
·
Also get the respective service account
provisioned for the RMS Server to manage and need to specify the same during
RMS cluster configuration.
Configuring RMS
Server :
Here I am not posting screenshots, just mentioning what
needs to be taken care.
1)
Install the AD RMS Server role from server
manager and install the required features. After installation of the same
,right click the ADRMS console at the top and right click and click on Add
cluster, provide RMS Service account credentials in the place of service
account details.
2)
After above step, you will get cluster name and
right click on it and choose properties,
In properties you find following different tabs ,each
has it is own functionality,
It will have 2 sections, intranet and extranet, we have to specify the URLS in this two sections.
In the extranet URL section, need to specify the host name
configured in the reverse proxy server ( details in the following sections),
which has been exposed to internet and configured reverse proxy so that
requests will be routed to RMS Server from reverse proxy server.
This cluster server uses the proxy server to access external network in our case external server is reverse proxy server where proxy rule is configured so that whoever hits rms server from external will be authenticated by reverse proxy server and requests are sent back to the RMS Server.
1)
Local Server IP should be mapped or natting has
to be done with the public IP of the reverse proxy server.
2)
Install IIS server, host name to be mapped with
the public IP by doing URL publishing.
3)
DNS entry has to be created locally and also in
extranet (URL Publishing) with host name.
4)
SSL certificate should be ready with the host
name mapping done, during creation of SSL certificate.
·
Install URL
Rewrite module for IIS with the help of Web Platform Installer and Also install
Application Request Routing (ARR) for IIS with the help of Web Platform
Installer
·
Open Internet
Information Services (IIS) Manager and navigate to Sites → Default Web Site and
select URL Rewrite from IIS features.
·
Right click in
the Inbound Rules Section and click Add Rule(s)…
·
Select Reverse
Proxy under Inbound and Outbound Rules section
·
Provide the
details of the server to be redirected to and click OK
·
Now you can see
the Rewrite rule added to the Inbound Rules section.
·
Now we need to specify this HOST NAME url in the
RMS Server under clustered url section and under extranet url section.
In the RMS Server :
Open IIS Manager and navigate to Default Web Site. Right click on Default Web Site and click Explore.
Navigate to _wmcs → certification
Right click on the
“ServerCertification.asmx” file and select Properties
Navigate to Security Tab and
click on Edit
Type Everyone and click on
Check Name, then click on OK.
Check Read & Execute and
Read permissions under Allow and click Apply, then click OK.
·
Turn on IRM service in SharePoint
Central Administration :After activating the
Rights Management service, you must sign into the SharePoint Central
Administration to turn on Information Rights Management (IRM).
·
Login into SharePoint Central Administration with a Farm
Administrator account
·
And then finally enable IRM in SharePoint
library.
With this whole configuration
is done, it does not have screenshots ,please mail me if you need I will send
document, my email is ramch011@gmail.com
Reference link : https://technet.microsoft.com/en-us/library/dd996632(v=ws.10).aspx
Thank you.


No comments:
Post a Comment